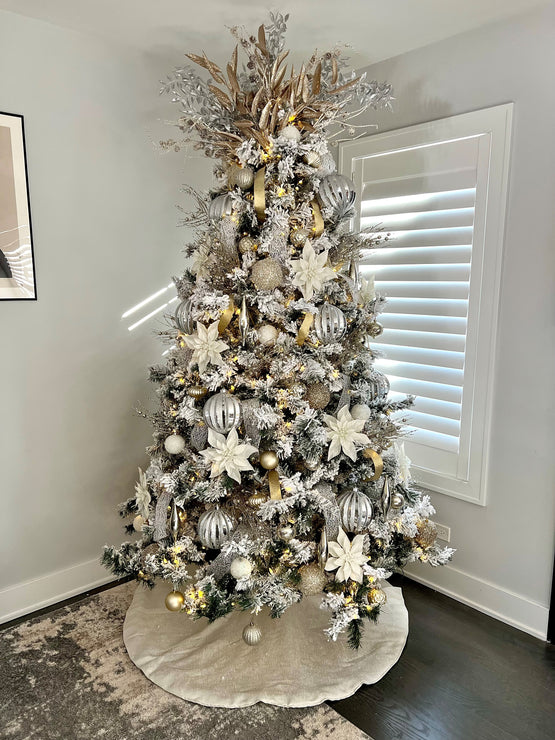
How to Decorate Your Christmas Tree Like a Pro
Creating a full and festive Christmas tree like the professionals isn't as difficult as it seems! It's always important to plan out your vision beforehand so you have enough ornaments and other accessories that go with your vision. Once you decide on your theme and have all of your decorations out, you're ready to start your Christmas transformation!
Step 1: Assemble and Fluff

First, start with taking your tree out from its box or bag and attach the base to the bottom pole. From there, fluff the bottom tier of the tree until it looks more full. Then, attach the middle tier and also fluff that section. Repeat that for the top tier as well. Finally, plug in your lights and set it to your favorite setting. We recommend fluffing as you attach the tiers so you can easily bring the tree back to life section by section.
Shop this tree model or shop all tree models.
Step 2: Place Your Tree Skirt

Place your tree skirt down early so you don't have to crawl under the tree with ornaments hanging. Make sure to velcro or tie the skirt securely and tuck under any wiring. Once that is secured, you're ready to start adding the fun!
Step 3: Place the Largest Ornaments

Place your larger sized ornaments or decorations first. That way, you can create balance on the tree and have a guide where to place smaller and more delicate ones. We spread them evenly throughout the tree from top to bottom to give a full-effect.
Step 4: Add Smaller Ornaments

Use your smaller ornaments to fill any empty spaces throughout your tree. Make sure to use a variety of shapes and sizes to give more texture and decorative elements.
Step 5: Cut and Place Ribbon

Cut pieces of ribbon that are 1-2 feet in length depending on the look you are going for. If you like tight, tucked ribbon, go with 1 ft. If you like a more relaxed and fluffy ribbon, use 2 ft. pieces. We used about 25 yards of ribbon for a 7.5 ft. tree to achieve this look. We also recommend using at least 2 types or colors of ribbon to add more texture to the tree.
Once you have your pieces cut, tuck one end of the ribbon into the tree and the other end a few branches below. Some find it easier to use twist ties if you string them horizontally instead of vertically. But, it is not necessary if you are able to tuck it securely.
Step 6: Add Florals

Add a floral element to your tree! We decided to go for poinsettias, but you can also use decorative evergreen, pine, berries, eucalyptus, or pinecones to break up repetitive ornament patterns. Or, if your vision doesn't include any florals, skip this step.
Shop Christmas florals & picks.
Step 7: Place Decorative Picks

Place some decorative picks to add some sparkle and depth to your tree. We scattered them throughout, but left about a foot open both on the top and bottom for balance. If you see any holes in your tree, this is the perfect way to fill them towards the end of decorating.
Shop Christmas florals & picks.
Step 8: Add Your Tree Topper

Add your tree topper to finish your beautiful tree! If you chose a classic star or angel, simply plug it in and adjust it evenly to sit right on the top of the tree. We decided to use picks to create this glittery, bursting topper. Here, we used around 12 picks to make it large and full. You may need a step stool for this step to ensure each pick is secure within the branches.
Shop our Christmas tree toppers.
Finished Tree:

Now, you're ready for the big reveal!
********
We hope this gave you some tree inspiration and helps you create the most festive tree yet! We'd love to see your creation! Tag us on social media @AmericanSale on Facebook, Twitter, or Instagram or submit your photos to our Customer Gallery here.
Don't forget that we're your one-stop-shop for all your holiday décor! From inflatables, to over 180 trees, to pillows and signs, we've got everything you need to transform your home into a Winter Wonderland this Christmas!


